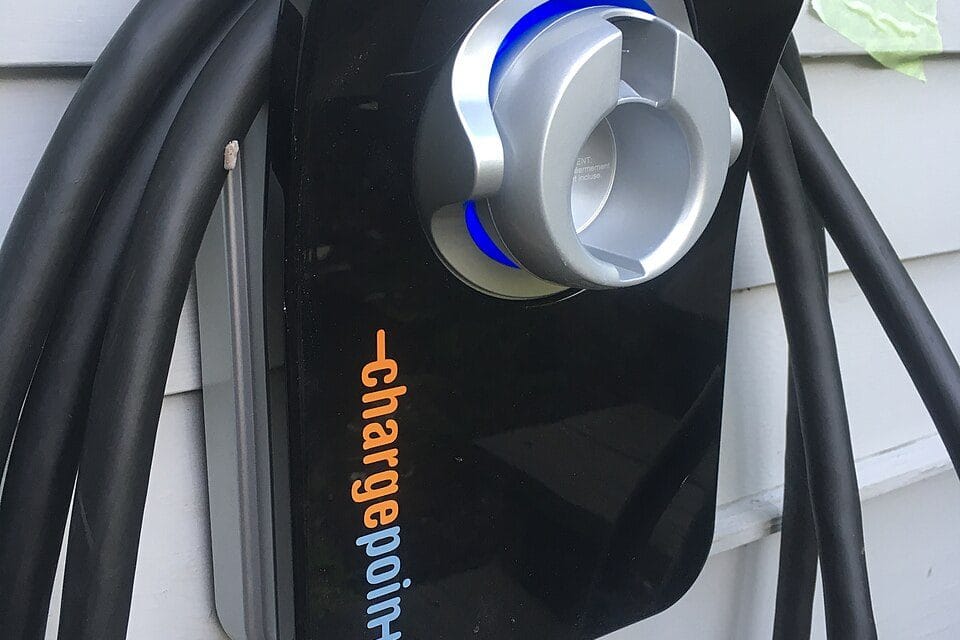
Fit your own outdoor socket, swap the plug for a charging head, job done — that's roughly how plenty of otherwise capable homeowners picture an EV charger install, right up until an electrician explains why a 32-amp circuit running for six hours a night through a damp driveway is nothing like wiring in a garden light. An EV charging point draws more sustained current than almost anything else in a domestic property, night after night, for years on end. That single fact pulls the whole job into a different regulatory category from a socket or a light fitting, and it's why the work genuinely does split into two halves: one half you can do yourself with a free Saturday and a decent toolkit, and one half that has to be signed off by somebody qualified before the unit is switched on. Get the split wrong and you're not just risking a failed inspection — a badly earthed EV supply on a PME system can, in a genuine fault, put a dangerous voltage onto every earthed metal surface in the house. None of that puts the whole job out of reach for a competent DIYer. It just means knowing exactly where your competence, and your legal cover, actually stops.
The Job Splits in Two, and the Split Matters
Most domestic EV charger installs break down into two distinct stages, and the boundary between them is where the legal complexity actually lives. Stage one is first-fix work: deciding where the charge point goes, planning the cable route from the consumer unit, chasing a channel into masonry or running surface-mounted conduit, drilling through an external wall if the cable needs to reach a detached garage or a post out on the driveway, and mounting the backplate ready for the charger itself. None of that involves making a live connection to the supply. Stage two is the part that has to be carried out, or at the very least tested, verified and signed off, by someone holding the right qualifications: connecting the new circuit at the consumer unit, assessing the property's earthing arrangement, fitting the correct protective devices, and running the initial verification tests that BS 7671 demands before any new circuit gets energised. Plenty of online guides skate straight past how much of that second stage is genuinely non-negotiable, and that's usually where people run into trouble — not because the physical work is beyond them, but because the earthing assessment and the paperwork are the actual point of the regulation, not an optional extra bolted on afterwards.
What a Competent DIYer Can Actually Do
Everything up to the live connection is fair game, and doing it yourself is where the real labour savings sit. A wall chaser from Screwfix (roughly £70–£90 to buy, or around £45 a day to hire from HSS Hire if you'd rather not own one) will cut a clean channel for the cable run through render or brickwork, and galvanised steel conduit — or PVC conduit rated for the location — protects the cable and satisfies the 50mm safe-zone rule that BS 7671 applies to concealed cables outside the usual permitted zones. If the charger sits on a post out on the drive rather than the house wall, you're into groundwork: digging a trench to the standard 450–600mm depth — keeping clear of the kerb and any drainage run — laying sand and cable-marker tape before backfilling, and setting the post itself in a bag or two of postcrete from Wickes or B&Q. Steel wire armoured cable, sold by the metre at Screwfix, Jewson or Travis Perkins, is the sensible choice for any run buried in the ground or exposed outdoors, and it copes far better with being driven over or knocked by a wheelbarrow than twin-and-earth ever will.
- Marking out the cable route and confirming it clears drains, existing services and tree roots before you dig anything
- Chasing walls or laying conduit, then making good the surface afterwards — a coat of Dulux Weathershield masonry paint in a matching colour hides a chased-and-filled channel almost completely within a season
- Organise a core drill hire for the day — it punches a clean wall penetration through solid brick or block far more reliably than forcing an ordinary SDS bit through it
- The charger's backplate goes at the height the manufacturer specifies, usually somewhere between 750mm and 1200mm, and positioned so a reversing car can't clip it
- Ronseal Fence Life or a similar exterior wood treatment on any new timber post or gate keeps it looking presentable through its first winter
What you shouldn't do, whatever the temptation to finish the job in one weekend, is terminate the cable at either end yourself — that boundary isn't really open to interpretation, whatever a YouTube video might suggest.
Where BS 7671 and Part P Take Over
Almost nobody DIYing this job has heard of PME loss-of-neutral risk, and that's precisely the point of the regulation existing in the first place.
Most UK homes are supplied through a PME (protective multiple earthing) arrangement, where the earth and neutral are combined somewhere back up the network. Under normal conditions that's perfectly safe, but if the combined conductor fails upstream of the property — rare, but it does happen — every earthed metal part in the house can become live at the same moment an EV is plugged in outside, sitting on damp ground, effectively bridging the fault to earth. Section 722 of BS 7671, the part added specifically for EV charging installations under Amendment 2 of the 18th Edition, requires either a charging point with its own built-in open-PEN fault protection, a separate protective device, or a switch to a TT earthing arrangement with its own earth rod at the charge point. Working out which of those applies to a given property is an assessment a registered electrician makes on site — it isn't something you can look up from a chart, because it depends on the exact earthing arrangement the network operator installed, which varies street by street and sometimes house by house on the same road. It's also worth asking the electrician to check the actual service head and cutout rather than assuming from a neighbour's setup, because supply upgrades to PME have happened in patches over the decades and left some houses on the older TT arrangement without anyone realising. That assessment, plus fitting the correct RCD or RCBO protection and running proper insulation-resistance and earth-loop-impedance tests afterwards, is the part of the job that genuinely needs someone qualified, not a jobsworth formality invented to keep tradespeople in work.
Part P of the Building Regulations then sits on top of all that. A new circuit for EV charging is notifiable work, and the normal route is a registered electrician working under a competent person scheme — NICEIC, NAPIT and ELECSA are the common ones — who self-certifies the job and notifies the local authority on your behalf, usually folded into their fee with no extra step for you. Do the final connection yourself and, strictly, you're supposed to submit a Building Notice to the council and pay for Building Control to inspect and test the work, typically £200–£350 depending on the local authority, on top of buying or hiring a multifunction tester that starts at around £400 if you don't already own one. If you genuinely hold the qualifications and testing kit, self-certification under some competent person schemes is open to you directly. For everyone else, the sums above are exactly why almost nobody DIYs the connection itself, whatever they've managed with the first fix.
What It Actually Costs, Both Ways
A straightforward supply-and-fit installation — a 7kW tethered charger on a house wall close to the consumer unit, no trenching, no consumer unit upgrade — typically runs £800–£1,500 fully fitted and certified. Add a consumer unit upgrade because the existing board has no spare capacity, or is an old fuse box that won't take a modern RCBO, and you're looking at another £350–£600. A longer run to a detached garage or a driveway post, with trenching and armoured cable, can push the total to £1,800–£2,500 depending on distance and ground conditions. Doing your own first fix and paying an electrician purely for the connection and certification — assuming you can find one willing to sign off work they didn't do themselves — typically costs £250–£450, a real saving, though not every electrician offers that stripped-down service, and some will insist on inspecting, or redoing, parts of your first fix before they'll put their name to it. Buy the tethered version, not the socket-only unit, if the budget allows for it — the extra £100 or so removes an entire category of dodgy customer-supplied cables that account for a fair share of the fault call-outs electricians would rather not attend. Worth knowing before you count any saving as guaranteed: the OZEV homeowner grant that used to knock money off the price for anyone with off-street parking ended for most owner-occupiers back in March 2022, so don't build it into the budget unless the property is a rented or leasehold one, where a version of it still applies.
The Mistakes That Cost People Twice
Skip the earthing assessment and wire the charger up as though it's an ordinary circuit, and the fix later — retrofitting a TT earth electrode once someone finally checks — costs more in groundwork than doing it properly would have cost the first time. A charger that doesn't meet the Electric Vehicles (Smart Charge Points) Regulations 2021, which require new domestic charge points sold in the UK to default to smart, randomised-delay charging, can leave you needing to swap the entire unit before an electrician will agree to connect it. Mounting height matters more than most buyers expect: fit the unit too low, or too close to where a bumper swings on the turn into the drive, and it gets clipped within the year — check the clearance against the actual car on the drive, not just the manufacturer's generic diagram. And backfilling the buried cable trench with cheap hardcore or sharp stone instead of proper sand and pea shingle from a Jewson or Travis Perkins yard invites exactly the kind of slow cable damage that doesn't show up until the charger starts tripping intermittently eighteen months later, by which point you're digging up a driveway to find out why.
None of this is an argument for handing the whole project to a contractor and staying out of it entirely. It's an argument for doing the half that's actually yours to do properly, and paying properly for the half that isn't.