How to Clear Blocked Guttering and Downpipes Before the Next Summer Downpour
After weeks of dry weather, a summer downpour is exactly when clogged gutters show their true colours. Here's how to clear guttering and downpipes safely in an afternoon, spot sagging brackets, and know when it's a roofer's job instead.
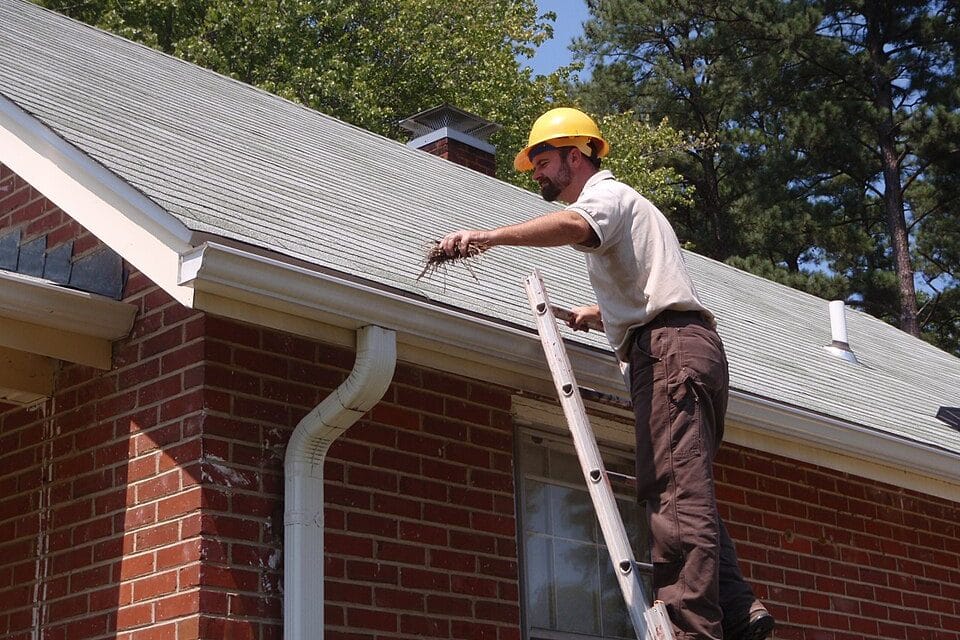
Six weeks without meaningful rain, then a sudden July thunderstorm hits — and instead of running quietly through the downpipe, water is sheeting down your rendering and pooling against the foundations. That's not bad luck. It's a gutter that's been quietly filling with spring blossom, moss and roof grit since April, waiting for exactly this moment to prove it can't cope.
Blocked guttering is one of those jobs that never feels urgent until the first proper summer storm exposes it, and by then you're dealing with water finding its way behind fascia boards, staining brickwork, or worse, tracking down into a cavity wall. The good news is that clearing a gutter run and checking the downpipes is a job most competent DIYers can finish in an afternoon, with under £50 of kit from Screwfix or B&Q. The bad news is that a fair number of people do it dangerously, on the wrong ladder, without checking the one thing that actually causes the damage — the brackets and joints, not the leaves sitting in the trough.
Why July storms catch gutters out
Gutters that coped fine all winter can fail spectacularly in summer for a simple reason: they've had months to accumulate debris during dry weather with no rain to flush it through. Spring blossom, seed pods, and moss shaken loose by nesting birds all settle into the trough, and because there's been no heavy rain since April, none of it has washed down to the downpipe outlet. Add three weeks of drought and the debris compacts into something closer to compost than leaf litter. When 20mm of rain falls in forty minutes — not unusual for a UK summer storm — a half-blocked 112mm gutter simply can't move that volume of water, and it overtops at the lowest sag point in the run, which is usually directly above a door or window. This matters more than people think for older properties, because a Victorian terrace with solid brick walls and no cavity has nothing to stop water tracking straight through to an internal wall once it's running down the brickwork for long enough, and a few hours of overflow during one storm can do more damage than a slow drip would do in a year. If you've had any hint of a damp patch appearing on an upstairs ceiling near an external wall after heavy rain, check the gutter above that spot before you call in a damp specialist — nine times out of ten it's a blocked or sagging gutter, not rising damp, and it costs nothing to rule out.
Ladder safety comes before any of this
Don't skip this section because you've done it a hundred times. Gutter work accounts for a disproportionate number of DIY ladder falls precisely because people lean out sideways to reach "just a bit further" along the run rather than moving the ladder. Follow the 1-in-4 rule — for every four units of height, the ladder base sits one unit out from the wall — and never work with your belt buckle past the stiles on either side. A ladder stand-off bracket (around £25–£35 at Screwfix) holds the top of the ladder away from the gutter itself, which does two things: it stops the ladder resting on and potentially cracking the plastic gutter, and it gives you a wider, more stable reach along the run without repositioning every metre.
For anything above a single storey, or where the ground beneath is uneven, hire a proper podium step or tower rather than improvising with an extension ladder — HSS Hire rents a basic podium from around £45 a day, and it's worth every penny compared to an A&E visit. If your house is a two-storey semi with a flat lawn and good footing, a well-footed extension ladder with a stand-off is genuinely fine. If you're dealing with a dormer, a bay window roof, or anything with restricted access, that's the point where hiring scaffold towers or calling a roofer stops being overcautious and starts being sensible.
What you actually need
You don't need a huge kit for this.
A plastic gutter scoop (around £6 from Wickes) clears bulk debris faster than gloved hands and won't scratch uPVC guttering the way a metal trowel will. Beyond that:
- A garden hose with a jet nozzle, for flushing the run through once the bulk debris is out
- A cordless wet-and-dry vac if you've got one — a Karcher WD3 (roughly £80 at B&Q) makes short work of the sludge at the bottom without you needing to bag it up on the ladder
- A bucket with an S-hook to clip onto a rung, because you will drop the scoop into the flowerbed otherwise
- Sealant-grade silicone or a proper gutter-jointing compound like Evo-Stik Gutter Seal (around £8 a tube) for any leaking joints you find along the way
- A cheap pair of rubber gloves, since gutter sludge is genuinely unpleasant and you don't want it on bare skin for the rest of the day
Skip the pressure washer. It's tempting, but pointing a pressure washer along a gutter run tends to blast debris and standing water straight over the fascia and down the wall you're trying to protect, and on older uPVC it can crack ageing joints that a hose and scoop would leave alone.
Clearing the run itself
Work from the downpipe outlet backwards, scooping debris into the bucket rather than letting it wash down and block the pipe you're about to rely on to carry water away. Once the bulk material is out, run the hose along the trough and watch where the water goes: it should move steadily toward the outlet with a visible fall, not sit flat or pool. A gutter should fall roughly 1:600 along its length — barely perceptible to the eye, but enough that standing water after a flush means the brackets have sagged, not that you missed a bit of debris.
Sagging brackets and leaking joints
Here's the part most people skip, and it's the part that actually causes the overflow. A gutter can be completely clear of debris and still overflow in a downpour if one bracket has dropped a few millimetres, creating a low point where water backs up rather than flowing to the outlet. Sight along the run from ground level after clearing it — a sagging section is usually obvious once the trough is empty, showing as a dip against the otherwise straight fascia line. Loose brackets are a five-minute fix: uPVC gutter brackets run about £3–£4 each at Wickes, and refixing one is a matter of unscrewing it, packing or repositioning against the fascia, and screwing back in with the gutter clipped level. Leaking joints show up as a damp streak on the wall below a union rather than actual dripping, which is why people miss them — by the time you notice active dripping, the joint has usually been failing for a season already. Clean the joint thoroughly, let it dry completely, and apply gutter-jointing sealant along the seam rather than just squirting it at the gap; a proper bead needs to bond to both faces of the joint to actually seal under pressure. If a whole length of gutter is cracked rather than just the joint, replacing a 4-metre length of uPVC guttering costs around £8–£12 a metre at B&Q or Wickes and is a straightforward same-day swap, provided you match the profile — half-round, ogee and deep-flow sections aren't interchangeable, so take the old bracket to the shop rather than guessing.
Downpipes: the blockage you can't see
A clear gutter with a blocked downpipe overflows just as badly, and it's the fault people check last because you can't see inside the pipe from ground level. Feed the hose in from the top of the downpipe and watch the gulley at the base — if water backs up and doesn't clear within a minute or two, there's a blockage somewhere in the run, usually at a bend where leaves and grit collect. A set of drain rods (hireable from HSS for around £15 a day, or buy a set from Screwfix for about £25) will clear most blockages by feeding through from the top; for a stubborn one, undo the pipe at the lowest access point, which is usually a rubber-jointed section just above the gulley, and clear it from below instead.
Check the gulley itself while you're down there. It's easy to assume the downpipe is blocked when actually the gulley grid at ground level has silted up with the same blossom and grit that clogged the gutter above, and clearing that takes thirty seconds with a trowel rather than an hour with drain rods.
When this stops being a DIY job
Building Regulations Approved Document H covers rainwater drainage, and while clearing an existing gutter doesn't trigger any regulatory requirement, replacing or rerouting rainwater goods on an extension or new build does need to meet its capacity guidance — this is worth knowing if you're planning to add a downpipe rather than just clear the existing one. For everyday maintenance, though, the regs aren't the trigger for calling a professional. The trigger is structural: if the fascia board itself is soft or rotten where the bracket screws into it, if there's visible movement in the guttering when you touch it from the ladder, or if you're looking at anything above a two-storey house with restricted ladder access, that's a roofer's job, not a Saturday-afternoon one. A fascia repair typically runs £150–£400 depending on length and whether soffits need replacing too, and it's money well spent rather than a screw driven into rotten timber that fails again within a year.
Do this once a year, ideally in early summer after the blossom has finished falling but before autumn leaf-fall properly begins, and the July-storm scenario mostly stops happening to you. Leave it two years running and you're back to square one, scooping compacted debris off a ladder in the middle of a downpour because that's the only time anyone actually notices.